Description
In the first few months, babies grow incredibly fast, and before you know it, your little treasure has become a young adult. With our organic baby impression material, you can create a hand or footprint of your precious baby, making it an unforgettable keepsake. Our impression material, made from certified organic potato starch, has been tested by an independent testing institute to ensure your child's safety. It meets the requirements of EN 71-3 and EN 71-9 (toy safety standards). The impression material is manufactured entirely in Germany. These prints make an ideal and memorable gift for a newborn. For optimal results, we recommend using the accessories included in our organic baby impression kits and only purchasing the organic baby impression material as a refill for additional prints.
Areas of application
Step 1:Ensure you have a smooth and clean work surface. We recommend using baking paper. This prevents the clay from sticking to the surface and protects your furniture from residue. Wash and dry your hands before using the product to avoid getting the modeling clay on your hands.
Step 2:Remove the modeling clay and knead it thoroughly for at least 5 minutes to ensure a homogeneous mass is formed. This will prevent cracking or breakage after drying. Pay particular attention to ensuring that no air bubbles form.
Step 3:Place the mixture in the center of the cutter and press it into the shape with your hands. Smooth it out with the included rolling pin to a thickness of approximately 0.8 cm. The mixture should be the same height as the cutter. If the included rolling pin is too small, you can use your own (e.g., a pastry roller).
Tip:To prevent the clay from sticking to the rolling pin, we recommend dusting it with a little flour or cornstarch. For a clean edge on the impression, we recommend carefully removing the cutter from the clay. Use the cutter to carefully cut through the clay again and then reposition the cutter around the impression.
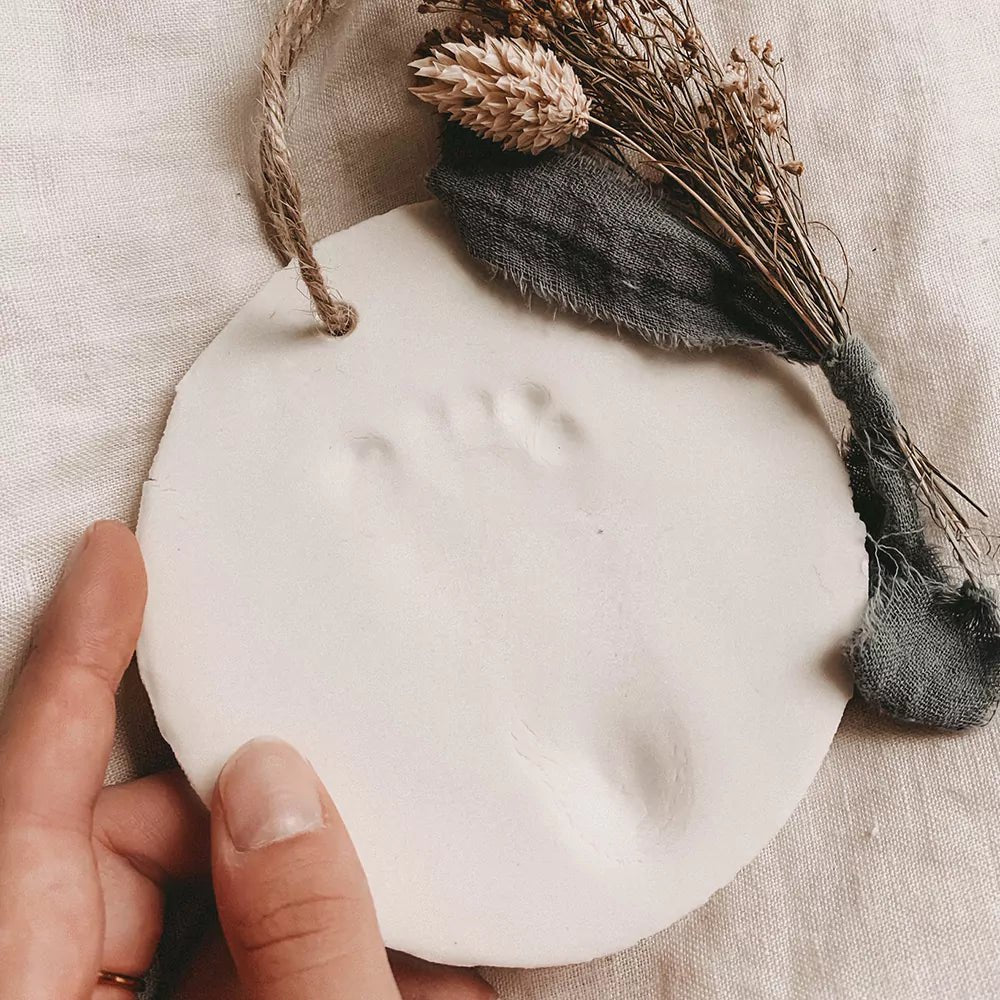
Step 4:Wash and dry your baby's hands or feet. Then press your baby's hand/foot into the prepared modeling clay until an imprint is formed. If you are not satisfied with the result, you can repeat the process from step 2.
Please note:The impression should not be too deep, otherwise the material will crack after drying, but also not too shallow, so that the impression is clearly visible. An ideal depth is approximately 4 mm. The cutter should be placed around the impression material to prevent distortion.
Step 5:If needed, don't forget to poke a hole in the top of the modeling clay. This is where you can attach the ribbons for hanging once it's dry. Make sure the hole isn't too close to the edge to prevent the clay from cracking. Maintain a minimum distance of 8 mm from the edge. Now carefully remove the cutter from the shape.
Tip:For a clean and even result, use a pen of the desired thickness or the enclosed wooden roller to drill the hole.
Step 6:Allow the impression to air dry for at least 24 hours. Then turn the impression over and allow the other side to dry for at least 24 hours as well. The impression can now be carefully processed further. Please note that for optimal hardening, the impression may require up to one week. During this time, the material will harden completely. The drying time depends on the room temperature and humidity.
and may therefore vary. Place the mixture on a piece of kitchen paper to dry. Baking paper prevents the mixture from drying optimally. Do not touch the mixture during this time to prevent warping. Do not use the oven to dry the mixture, as this can cause it to crack. Do not accelerate the drying process with a radiator, as this can also lead to cracking. Do not leave the mixture unattended for the entire drying time.
The drying process should be done on one side, as this can cause the sides of the print to lift, leading to an unsightly result.
Tip:If the hole for hanging is not cleanly punched, improve it with the wooden roller or pen after the first 24 hours of drying time.
Step 7:Attach one of the ribbons to the hardened impression and hang it up. Done!
Please note:Do not use the die-cut as a frame!
Further application instructions:The modeling clay should be used as soon as possible after opening the container. Ensure that any leftover clay is stored in an airtight container. If cracks or minor breaks occur, the clay can be reused for repairs. Should the clay unintentionally become too hard, simply knead it vigorously several times with slightly damp hands. This will restore its original pliability. Please note that adding water may increase the drying time.
You can find the safety instructions for the product in our user manual under the "Downloads" tab.